How to Diagnose Sealing, Induced Airflow, Extraction and Filter Problems at Cement Transfer Interfaces
Why Does Cement Dust Escape at Transfer Points?
Cement transfer point dust leakage can occur where conveyors, chutes, elevators, air slides, or other powder-handling equipment connect. These transfer points connect different stages of a cement or powder handling system.
Typical examples include:
- Air slide conveyor outlets
- Screw conveyor discharge points
- Bucket elevator outlets
- Transfer chutes
- Equipment inlet and outlet connections
- Enclosed conveyor transfer points
- Powder handling equipment interfaces
Although the equipment may be enclosed, material still has to change direction, velocity, or elevation when it passes through the transfer point.
During this process, three things can happen at the same time:
Material enters the transfer point
→ material impacts or changes direction
→ surrounding air is displaced or entrained
→ fine cement particles become suspended
→ dust-laden air moves toward openings
If the transfer enclosure, sealing, and extraction system cannot control this air movement, visible dust may escape.
This is why cement transfer point dust leakage should not automatically be treated as a simple sealing problem.
For a broader overview of dust sources throughout cement handling operations, see our cement plant dust control guide.
Material Leakage vs. Airborne Dust Leakage
Before troubleshooting the dust collection system, first determine what is actually escaping from the transfer point.
Material Leakage
Material leakage usually appears as visible cement accumulation around flanges, chute joints, flexible connections, inspection covers, or equipment interfaces.
Typical causes include damaged seals, loose connections, poor alignment, material buildup, excessive feed, or worn flexible joints.
In this case, the primary problem is mechanical containment.
Airborne Dust Leakage
Airborne dust leakage occurs when fine cement particles are carried outward by moving air, even when the transfer point is mechanically enclosed.
Typical signs include:
- Dust clouds around small gaps
- Dust increasing at higher throughput
- Dust escaping from several openings
- Dust becoming worse when material impact increases
- Dust reducing when throughput is lowered
In this case, sealing alone may not solve the problem. The internal airflow and extraction condition must also be checked.
1. Poor Sealing Creates an Easy Dust Escape Path
The most obvious cause is poor mechanical sealing.
Common leakage locations include:
- Chute flanges
- Inspection doors
- Flexible connections
- Conveyor covers
- Equipment inlet connections
- Expansion joints
- Bolted joints
A small opening may appear insignificant while the equipment is stopped.
During operation, however, dust-laden air inside the enclosure can move toward that opening.
The result is:
Internal dust-laden air
→ pressure difference
→ air moves toward the gap
→ fine cement escapes with the airflow
This means a visible dusty flange does not necessarily prove that the flange itself created the dust.
The gap may simply be the easiest escape path for dust generated somewhere else inside the transfer point.
What to Check
Inspect:
- Gasket condition
- Bolt tightness
- Flange alignment
- Flexible connection wear
- Inspection-door sealing
- Housing deformation
- Cracks or worn joints
If dust escapes only from one localized joint while the rest of the system remains clean, sealing should be one of the first checks. However, sealing the visible gap may only move the problem elsewhere if dust-laden air inside the enclosure remains uncontrolled.
2. Excessive Drop Height Creates More Impact and Air Movement
Material drop height has a major influence on transfer-point behavior.
When cement or another dry bulk material falls through a larger vertical distance, it can:
- Accelerate before impact
- Create stronger turbulence
- Entrain surrounding air
- Suspend more fine particles
- Increase dust loading inside the enclosure
The basic relationship is:
Greater free fall
→ stronger material impact
→ greater air disturbance
→ more suspended dust
→ more difficult containment
This principle is particularly important at transfer chutes and equipment discharge points.
Similar principles are described in NIOSH guidance for transfer-point dust control, including reduced fall height, improved containment, and controlled airflow.
Check for:
- Excessive vertical distance between equipment
- Poor chute geometry or sudden direction changes
- Material striking a flat surface directly
- High-velocity discharge into a confined enclosure
The objective is not always to eliminate every drop. It is to create a controlled material path with less unnecessary impact and turbulence.
3. Displaced and Entrained Air Has No Controlled Escape Path
This is one of the most commonly overlooked causes of transfer-point dust.
When material enters a confined chute or enclosure, it occupies space and interacts with surrounding air.
Some air is displaced by the incoming material.
Additional air can also move with the falling material stream.
At transfer points, air movement can include air displaced by the incoming material and air entrained by the falling material stream. In an enclosed transfer point, this airflow can change local pressure and carry fine dust toward available openings.
The practical result is simple:
Material enters
→ air movement increases
→ enclosure pressure changes
→ dust-laden air looks for an exit
If there is no controlled airflow path, dust may leave through:
- Flange gaps
- Inspection doors
- Conveyor openings
- Flexible joints
- Equipment connections
This explains why a transfer point can still produce dust even when the material itself is not physically spilling.
A Useful Diagnostic Clue
If several openings begin releasing dust at approximately the same time, do not repair each opening independently first.
Check whether the complete enclosure is becoming positively pressurized because the air cannot leave through the intended extraction path.
4. Dust Extraction Is Not Working Effectively
A transfer point connected to a dust collector still requires effective airflow at the actual dust source.
A typical extraction path includes:
Dust source
→ extraction connection
→ branch duct
→ damper
→ main duct
→ dust collector
→ fan
A restriction or poor design anywhere along this path can reduce dust capture.
Insufficient Extraction Airflow
Possible causes include:
- Partially blocked ducts
- Dust buildup inside a branch
- Incorrect damper settings
- Insufficient fan performance
- Increasing filter resistance
- Additional branches added without rebalancing
If dust becomes worse as material throughput increases, the transfer point may be approaching the practical capacity of its containment and extraction system.
However, this does not automatically mean the dust collector is undersized. The restriction may be in the branch duct, damper, filter, or extraction connection.
For a broader explanation of capture points, ductwork, dampers, filters, and fans, see our dust collection system page.
Extraction Point Position Matters
Air volume alone does not determine capture performance.
If the extraction connection is poorly positioned, dust may reach an opening before it is captured.
Common problems include:
- Extraction point too far from the dust source
- Large uncontrolled openings nearby
- Material obstructing the airflow path
- Short-circuit airflow from nearby openings
- Extraction port exposed to direct material impact
The goal is to draw dust-laden air toward the collection point without unnecessarily pulling product from the material stream.
More Extraction Air Is Not Always Better
Increasing suction can sometimes reduce dust leakage, but excessive extraction may also increase product carryover, filter loading, duct velocity, pressure loss, and fan power consumption.
The correct objective is:
Controlled airflow — not maximum airflow.
In centralized dust systems, branch airflow must also remain balanced. Excessive airflow through one branch can reduce suction available at another transfer point.
5. Filter or Duct Resistance Has Increased Over Time
Sometimes a transfer point works well when the system is new but gradually becomes dusty.
This often indicates increasing resistance somewhere in the extraction system.
Possible causes include:
- Heavily loaded filter elements
- Ineffective pulse cleaning
- Dust buildup inside ductwork
- Hopper buildup
- Damper position changes
- Fan performance deterioration
The relationship is:
Increasing system resistance
→ lower airflow at the transfer point
→ weaker containment
→ dust begins escaping
At this stage, check the complete dust collection system rather than focusing only on the transfer point.
For detailed diagnosis of filter resistance, bag blinding, pulse-cleaning failure, and other baghouse faults, refer to our industrial bag filter troubleshooting guide.
Where Is the Dust Escaping? Use the Symptom to Narrow the Cause
| Dust symptom | First area to check |
|---|---|
| Dust only from one flange | Seal, gasket, alignment |
| Dust appears when throughput increases | Material impact, induced airflow, extraction capacity |
| Several openings become dusty | Enclosure pressure and extraction airflow |
| Suction at the transfer point becomes weaker over time | Duct, damper, filter resistance, fan |
| Dust remains despite strong suction | Hood position, uncontrolled openings, airflow distribution |
| A large amount of cement enters the dust collector | Extraction velocity or pickup position |
| Dust and material both spill from the same point | Mechanical transfer design, blockage, alignment |
| Dust appears after system modification | Branch airflow balance and new system resistance |
This table should be used as a diagnostic starting point rather than as a replacement for site inspection.
How to Troubleshoot Cement Transfer Point Dust Leakage
Troubleshooting cement transfer point dust leakage requires a structured inspection rather than immediately increasing fan speed or replacing seals.
Step 1: Identify What Is Escaping
Determine whether the problem is physical material leakage or airborne dust.
Material accumulating continuously around one joint usually indicates a mechanical containment problem, while a dust cloud appearing mainly during material flow suggests that airflow should also be investigated.
Step 2: Identify the Exact Escape Point
Check whether dust is coming from:
- A flange or flexible connection
- Inspection doors
- Conveyor openings
- Chute inlet or outlet
- Several openings at the same time
The location of the leakage helps narrow the likely cause.
Step 3: Check Material Flow and Transfer Geometry
Inspect:
- Free-fall height
- Chute direction
- Impact location
- Material buildup
- Restrictions
- Equipment alignment
If dust increases strongly with throughput, check whether material impact and induced airflow have also increased.
Step 4: Check Sealing and the Extraction Path
Inspect genuine leakage points, then follow the extraction path:
Transfer point
→ extraction connection
→ branch duct
→ damper
→ dust collector
→ fan
Look for blocked ducts, incorrect damper settings, poor pickup position, or insufficient effective airflow.
Step 5: Check Filter Performance and Recent System Changes
If extraction has gradually weakened, check filter resistance and cleaning performance.
Also determine whether:
- New extraction branches were added
- Damper settings changed
- Production throughput increased
- Fan operating conditions changed
- Another production line was connected
A system that worked under the original operating condition may require rebalancing after modification.
How to Reduce Cement Dust at Transfer Points
Reducing cement transfer point dust leakage over the long term requires material flow, containment, and airflow to work together.
Good practice includes:
- Minimize unnecessary material drop
- Guide material smoothly through the transfer
- Keep the enclosure reasonably tight
- Eliminate unnecessary openings
- Position extraction points correctly
- Maintain balanced airflow through ducts, dampers, filters, and fans
The key principle is:
Do not treat material flow, sealing, and dust extraction as separate problems.
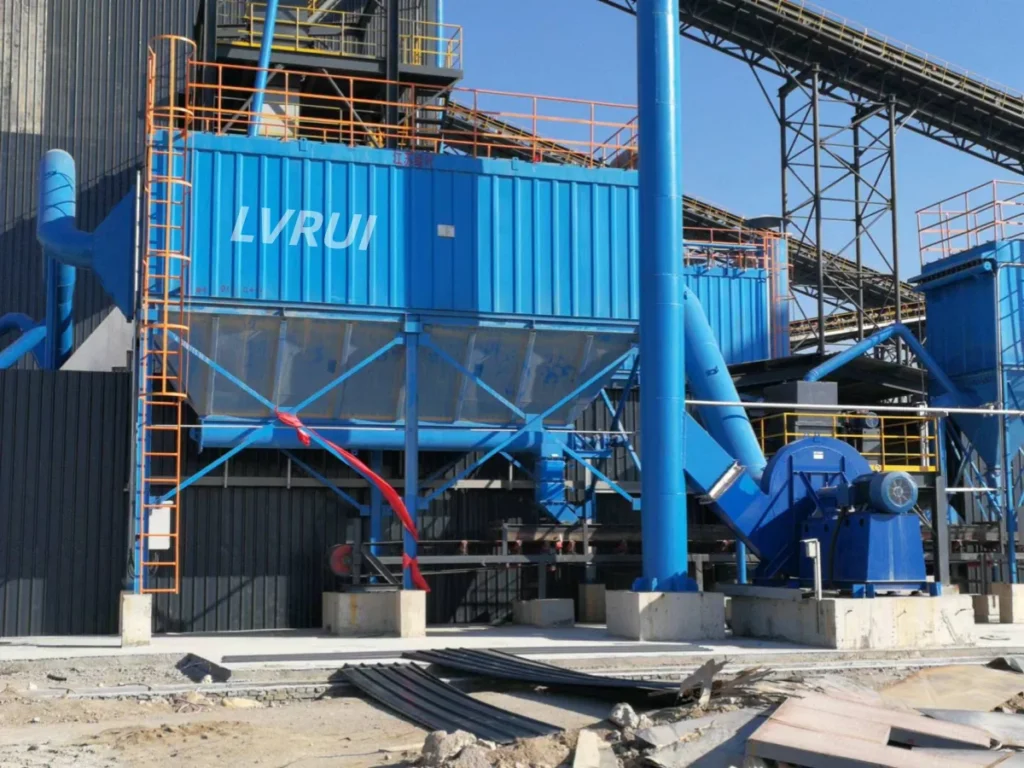
A transfer point performs best when all three are considered as one system. Where local or centralized filtration is required, the bag filter should be selected according to actual airflow, dust loading, operating conditions, and the overall extraction system.
Conclusion
Cement transfer point dust leakage is not always caused by a damaged seal or an undersized dust collector.
Dust can escape when excessive material impact generates turbulence, displaced or entrained air has no controlled path, enclosure sealing is poor, extraction airflow is ineffective, or resistance in the dust collection system increases.
A practical diagnostic sequence is:
Material flow
→ transfer geometry
→ enclosure and sealing
→ internal airflow
→ extraction point
→ duct and damper
→ filter and fan
The most effective solution comes from identifying whether the problem begins with material movement, containment, or airflow rather than simply increasing suction or repeatedly replacing seals.
FAQs About Cement Transfer Point Dust Leakage
Why does a cement transfer point become dusty only at high throughput?
Higher throughput can increase material impact, turbulence, displaced air, and dust loading. If the existing enclosure or extraction system cannot handle the changed operating condition, dust leakage may appear even though the equipment operates normally at lower capacity.
Can poor sealing cause cement dust leakage even if the dust collector is working?
Yes. Dust-laden air will often move toward the easiest available opening. Damaged gaskets, loose flanges, worn flexible joints, or open inspection points can therefore release dust even when the extraction system is operating.
Why does dust escape from several openings at the same time?
Dust appearing from several openings can indicate that pressure or airflow inside the enclosure is not being controlled effectively. Check extraction airflow, duct restrictions, filter resistance, and the amount of air entering with the material before treating each gap separately.
Should I increase dust collector airflow when a transfer point becomes dusty?
Not automatically. First inspect material drop height, enclosure sealing, hood position, branch duct condition, damper setting, filter resistance, and actual operating throughput. Excessive extraction can increase product carryover and system load.
Why did a transfer point become dusty after adding another extraction branch?
A new branch changes the airflow distribution and total resistance of a centralized dust collection system. The original branch may receive less suction unless dampers, fan capacity, and overall system balance are reviewed.
What information is needed to diagnose cement transfer point dust leakage?
Useful information includes material type, conveying capacity, upstream and downstream equipment, transfer height, chute dimensions, existing enclosure arrangement, extraction duct size, dust collector specifications, fan data, and photos or drawings showing exactly where the dust escapes.
Need Help With Cement Transfer Point Dust Control?
If dust is escaping from a cement or powder transfer point, please provide:
- Material being handled
- Required conveying capacity
- Upstream equipment
- Downstream equipment
- Transfer height
- Chute or connection dimensions
- Existing dust extraction arrangement
- Dust collector and fan information, if available
- Site photos or layout drawings
- Description of when and where the dust appears
Jiangsu Lvrui Machinery Co., Ltd. can review the material transfer and dust-control arrangement and provide equipment configuration recommendations based on the actual operating conditions.
Email: info@lvrui-conveyor.com
WhatsApp: +86 18261998937
WeChat: +86 18261998937