Practical troubleshooting for sticking blades, actuator faults, air leakage, mechanical wear, misalignment and control feedback problems in industrial air and gas duct systems.
Introduction
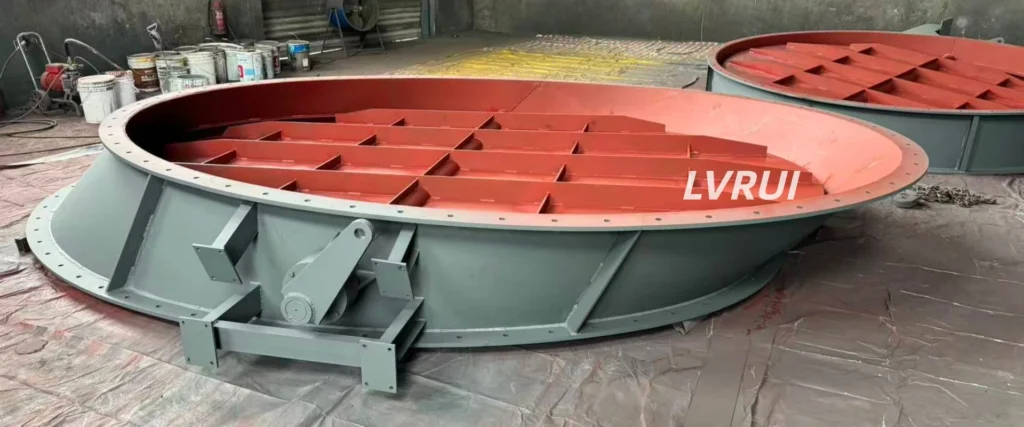
Butterfly damper troubleshooting in industrial ventilation, exhaust gas, and dust-laden air ducts often involves problems caused by dust buildup, repeated cycling, temperature changes, mechanical wear, or installation misalignment. Typical symptoms include difficult movement, incomplete travel, increased air leakage, abnormal actuator behavior, and incorrect position feedback.
Effective butterfly damper troubleshooting should begin with the actual operating symptom and then separate mechanical, actuator, and control-system causes.
It is also important to distinguish an industrial butterfly damper used for air or gas flow control from a butterfly valve used for direct discharge of cement, fly ash, or other bulk solids from silos and hoppers. Although they may appear similar, their operating conditions and troubleshooting logic are different.
Common Butterfly Damper Problems and Troubleshooting
Butterfly damper faults may originate from mechanical components, actuator systems, dust buildup, temperature effects, or installation conditions. The following sections cover the most common symptoms, likely causes, and practical inspection points.
Damper Blade Sticking or High Operating Resistance
A butterfly damper that becomes difficult to open or close usually has increased mechanical resistance in the blade, shaft, bearings, or linkage. In dusty industrial ducts, accumulated material is a common cause, but alignment and temperature effects should also be considered.
Typical symptoms include:
- Slow or uneven blade movement
- Higher actuator effort than normal
- The damper stopping before reaching the required position
- Increased resistance during manual operation
Possible causes include:
- Dust buildup around the blade, shaft, or bearings
- Bearing wear or increased bearing resistance
- Shaft corrosion or deformation
- Blade contact with the frame
- Linkage binding
- Duct misalignment or thermal distortion
Inspect the blade clearance, shaft, bearings, linkage, and connected ductwork before changing actuator settings. During a safe shutdown, confirm whether the blade can move freely without excessive mechanical resistance.
Remove deposits that interfere with movement and repair or replace worn bearings, damaged linkage, or deformed shafts as required. If duct misalignment has distorted the damper frame, correct the alignment rather than compensating with actuator adjustment.
Do not increase actuator torque before identifying the source of resistance, as excessive torque may overload the shaft, coupling, linkage, or blade.
Actuator Failure or Abnormal Response
Actuator problems can prevent a butterfly damper from opening, closing, or reaching the commanded position. Before replacing the actuator, confirm that excessive mechanical resistance in the damper is not causing the abnormal response.
Typical symptoms include:
- The actuator does not move after receiving a command
- Movement is slow or stops before full travel
- The actuator repeatedly trips or overloads
- The indicated position does not match the actual blade position
Possible causes include:
- Loss of electrical power or pneumatic air supply
- Incorrect control signal, limit setting, or travel adjustment
- Insufficient actuator torque
- Pneumatic leakage or solenoid malfunction
- Internal actuator wear
- Loose coupling, linkage, or excessive damper resistance
First verify the available power or air supply and confirm that the actuator receives the correct command. Then compare actuator output movement with the actual shaft and blade position.
For pneumatic units, check supply pressure, tubing, leakage, and solenoid operation. For electric units, verify the power supply, limit settings, overload protection, and control signal.
If the actuator operates normally but the blade does not follow, inspect the coupling, linkage, shaft connection, and mechanical resistance before replacing the actuator.
For a detailed explanation of how the blade, shaft and actuator work together, see our butterfly damper working principle guide.
Excessive Air Leakage or Poor Sealing
Some closed-position leakage may be normal for an industrial butterfly damper. Investigation is required when leakage noticeably increases, reduces the expected isolation effect, or begins to affect process control.
Typical symptoms include:
- Air continues through the duct when the damper is closed
- Leakage increases after long-term operation
- System pressure does not respond as expected
- Closure appears uneven or leakage occurs around the shaft
Possible causes include:
- Excessive blade-to-frame clearance
- Worn blade-edge or shaft seals, where fitted
- Dust or foreign material preventing full closure
- Blade or shaft misalignment
- Frame or blade deformation
- Incorrect actuator stop or travel setting
First confirm that the blade actually reaches the intended closed position. Inspect the blade clearance, sealing areas, shaft penetrations, and any buildup that may prevent full closure.
Damaged seals should be replaced where fitted, while misalignment or deformation should be corrected before changing actuator settings. Permanent blade or frame distortion may require component repair or replacement.
A standard industrial butterfly damper should not automatically be considered airtight or bubble-tight. Leakage depends on blade clearance, sealing design, shaft sealing, differential pressure, temperature, and alignment.
For standardized laboratory methods used to evaluate damper air leakage, pressure drop, operational torque, and elevated-temperature performance, refer to ANSI/AMCA Standard 500-D.
Excessive Wear, Abrasion or Corrosion
Butterfly dampers operating in dusty, abrasive, corrosive, or high-temperature ducts may gradually lose mechanical accuracy as blades, shafts, bearings, linkage, and sealing components deteriorate.
Typical symptoms include:
- Increased free play in the shaft or linkage
- Abnormal noise during movement
- Visible erosion or corrosion
- Increased air leakage
- Difficulty maintaining a repeatable blade position
Possible causes include:
- Abrasive dust passing across the blade and frame
- High gas velocity
- Moisture or corrosive gas exposure
- Bearing contamination
- Frequent operating cycles
- High-temperature exposure
Inspect blade edges and surfaces for erosion, the shaft for scoring or corrosion, bearings for excessive play or resistance, and linkage components for looseness or wear.
Wear may be concentrated on the blade leading edge or in areas exposed to higher dust velocity. Damaged bearings, linkage, seals, or severely eroded components should be repaired or replaced. If deterioration repeatedly occurs in the same location, review the operating conditions and material suitability rather than repeatedly replacing the same part.
Damper Misalignment or Mechanical Damage
Mechanical misalignment can affect blade clearance, shaft loading, sealing, and actuator operation. In duct systems, the problem may originate from the damper itself or from external loads transferred through misaligned flanges and unsupported ductwork.
Typical symptoms include:
- The blade rubs against the frame
- Resistance increases at certain positions
- The damper cannot fully open or close
- Blade-to-frame clearance is uneven
- Abnormal vibration or mechanical noise occurs
Possible causes include:
- Misaligned duct flanges
- External duct loads distorting the frame
- Bent or deformed shaft
- Blade or frame deformation
- Incorrect installation alignment
- Thermal movement or mechanical impact
Inspect the damper body and connected flanges for visible distortion, then check blade clearance around the perimeter. Localized rubbing or uneven clearance may indicate frame deformation, shaft misalignment, or blade damage.
Also inspect the shaft, bearings, coupling, and linkage where abnormal resistance occurs.
A damper body should not be forced into alignment by tightening misaligned duct flanges. This can distort the frame and reduce internal blade clearance. Permanently bent shafts, blades, or severely distorted frames should be repaired or replaced rather than compensated for through actuator adjustment.
For duct layout and installation considerations, see our guide to butterfly damper installation in industrial duct systems.
Position Feedback or Control Signal Errors
A butterfly damper may move mechanically as expected while the PLC or DCS displays an incorrect position or fails to confirm that the required position has been reached. These faults should be separated from actual mechanical or actuator failures.
Typical symptoms include:
- Displayed position does not match the actual blade position
- Open or closed confirmation is not received
- Position feedback changes erratically
- The actuator moves but the displayed percentage remains unchanged
Possible causes include:
- Incorrect limit switch adjustment
- Position transmitter calibration error
- Loose or damaged wiring
- Incorrect signal configuration
- Faulty position sensor
- Mechanical looseness or incorrect actuator travel setting
Begin by comparing the actual blade position, actuator indication, and PLC/DCS signal. If the blade reaches the required position but the control system does not confirm it, inspect the limit switches, transmitter, wiring, and signal configuration.
Where a position transmitter is used, calibrate its minimum and maximum values against actual blade travel rather than actuator indication alone.
After adjustment, confirm that actual blade position, actuator indication, limit signals, and PLC/DCS feedback remain consistent through several operating cycles.
A control-system alarm should not be treated as proof of a mechanical damper failure until the actual blade position has been verified.
Butterfly Damper Inspection and Maintenance Checklist
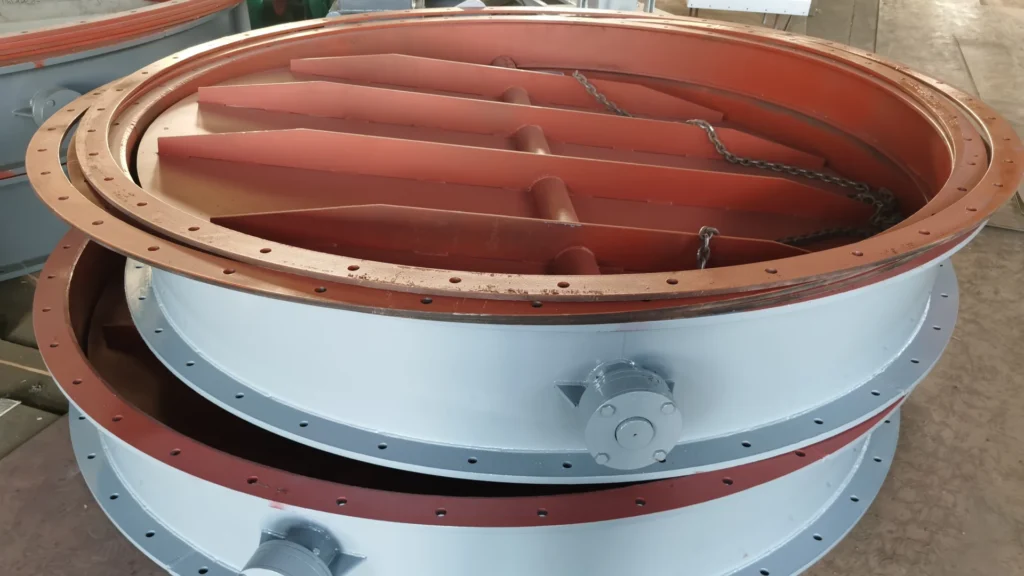
Preventive inspection should be based on actual operating conditions rather than a fixed calendar interval. Dampers exposed to high dust loading, abrasive airflow, elevated temperature, frequent cycling, or continuous operation generally require closer inspection.
During routine maintenance, check:
- Blade movement and full travel
- Shaft and bearing condition
- Linkage and coupling tightness
- Dust buildup around blade clearances and shaft areas
- Actuator response
- Limit switches and position feedback
- Abnormal rubbing, vibration, or noise
- Visible leakage or damaged sealing components
- Frame and duct alignment
After cleaning, adjustment, or component replacement, operate the damper through its required travel several times. Confirm that blade movement is smooth, actuator response is stable, feedback matches the actual blade position, and no abnormal rubbing or vibration remains.
Maintenance intervals should be adjusted according to equipment condition, operating severity, and planned shutdown schedules.
FAQ About Butterfly Damper Troubleshooting
How can I tell whether the problem is mechanical or actuator-related?
Check whether the blade and shaft can move freely during a safe shutdown. If mechanical movement is smooth but the actuator does not complete its travel, inspect the power or air supply, control signal, limit settings, and actuator condition. If the damper remains difficult to move without the actuator, the problem is likely mechanical.
Is some air leakage normal when a butterfly damper is closed?
Yes. Standard industrial butterfly dampers are not automatically airtight. Leakage depends on blade clearance, sealing arrangement, shaft sealing, differential pressure, temperature, and alignment. A noticeable increase in leakage should prompt inspection for buildup, wear, deformation, or damaged sealing components.
Why does a butterfly damper become harder to operate at high temperature?
Thermal expansion can change blade clearance, shaft alignment, bearing conditions, and frame geometry. If operating resistance increases only after the duct reaches working temperature, compare cold and hot operation and inspect for thermal distortion, reduced internal clearance, or temperature-related bearing and sealing problems.
Can dust buildup affect butterfly damper position feedback?
Yes. Dust buildup can restrict blade travel so the actuator or feedback device indicates a commanded position that the blade has not actually reached. Compare the actual blade position with the actuator indication and PLC/DCS feedback before recalibrating sensors or replacing control components.
How often should an industrial butterfly damper be inspected?
There is no universal inspection interval. Inspection frequency should be based on operating severity, especially dust loading, temperature, cycling frequency, abrasion, and planned shutdown schedules.
When should butterfly damper components be replaced instead of repaired?
Replacement should be considered when shafts, bearings, seals, linkage, blades, or frames have permanent deformation, severe abrasion, excessive play, or damage that cannot be corrected reliably by cleaning, alignment, adjustment, or normal repair. Identify the failed component before deciding to replace the complete damper.
Conclusion
Butterfly damper troubleshooting should begin with the actual operating symptom and a systematic inspection of the blade, shaft, bearings, linkage, actuator, and feedback devices. Dust buildup, mechanical wear, misalignment, temperature effects, and incorrect actuator settings can produce similar symptoms, so the root cause should be confirmed before replacing components or increasing actuator torque.
Regular inspection of industrial damper valves under actual operating conditions can help identify developing problems before they affect airflow control or lead to unplanned shutdowns. After maintenance, always confirm smooth blade travel, stable actuator response, correct position feedback, and acceptable leakage performance.
Need Help Troubleshooting a Butterfly Damper Problem?
If your butterfly damper is sticking, leaking excessively, failing to reach the required position, or showing abnormal actuator behavior, please provide:
- Damper size and duct dimensions
- Operating temperature
- Air, gas, and dust conditions
- Actuator type
- Description of the problem
- Photos or video of the damper and actuator
- Installation drawing, if available
Based on this information, LVRUI can help evaluate whether the problem is related to dust buildup, mechanical resistance, misalignment, component wear, actuator operation, sealing, or position feedback, and suggest appropriate inspection or corrective steps.
Email: info@lvrui-conveyor.com
WhatsApp / WeChat: +86-18261998937